Want to keep your plant nice and compact, yet want more rosettes? Here’s how to grow Echeveria in a tiny pot with lots of siblings!
There is just something about the aesthetic of succulents and small pots. Besides looking extremely adorable, small pots are the epitome of reduced care needs and easy maintenance. So, it’s quite natural for you to research how to grow Echeverias in tiny pots and yet get more rosettes!
How to Get Rosettes on Echeveria While in a Tiny Pot
1. Bright Light is Crucial
The key to having fuller Echeveria in any kind of pot is mimicking their natural habitat. As these hail from the sunny, dry climates of Mexico, Central, and South America, they will thrive in bright light; this is hardly a surprise. However, what matters is arranging for the right amount of sunlight based on your Echeveria variety.
Most varieties will prefer 4 to 6 hours of direct sunlight from south-facing windows to keep growing fuller and also to show beautiful red tips on the rosettes. We are speaking about varieties like the ‘Afterglow’ or ‘Sahara’, ‘Gigantea’, and ‘Big Red’. On the other hand, ‘Doris Taylor’ can get scorched in too much sun—so check what your plant prefers.
Notice stretching or leafiness? That’s your Echeveria asking for more light. Leggy growth usually means it’s focusing on stems, not rosettes.
Pro tip: If you lack bright windows, add supplemental grow lights to avoid leggy growth.
2. Keep the Leaves Plump and Firm
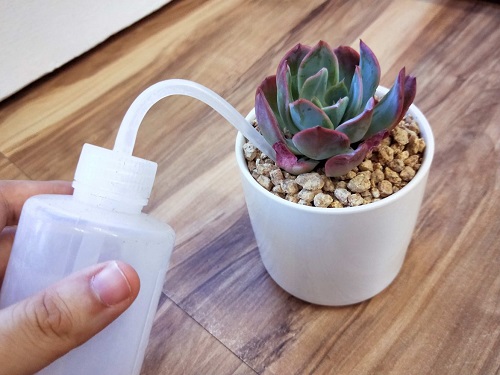
One of the main ways to keep your Echeveria looking healthy and getting more rosettes is to stop reaching for the watering can! Of course, you can’t keep it away forever.
How to tell when to water? Check the bottom leaves—if they’re plump, skip watering. If they’re soft or squishy, you’ve overwatered. In that case, let the soil dry out completely.
A good rule of thumb to follow is watering every 10 days to 2 weeks. Also, always check the soil dryness before watering. And only water the base—keep the rosettes dry.
Also, avoid misting. Misting creates humidity between the rosettes, leading to rot—especially in compact pots.
3. Using the Right Pot Material
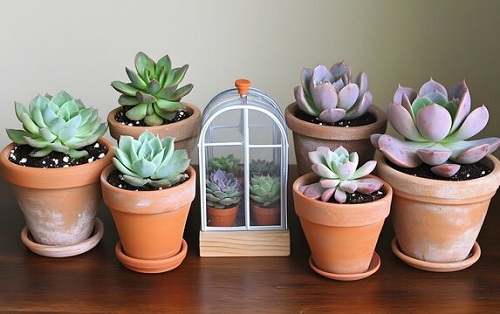
The pot size may not matter much if you have the right conditions, but the material of the pot does.
Plastic pots are light but risky. They retain too much water, risking root rot. Terracotta, on the other hand, absorbs moisture and allows the roots to breathe.
If you’re using glazed ceramic pots, make sure they have a good-sized drainage hole. These pots can trap moisture more than terracotta, so always keep an eye on soil dampness.
4. Don’t Forget a Well-Draining Soil Mix
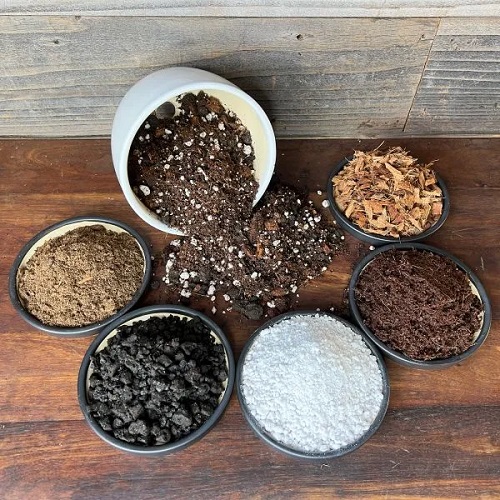
There are several steps to growing a nice and full Echeveria. Besides your watering schedule, you must pay attention to the soil!
Though a commercially bought standard cactus mix works well, there is just something about DIY soil mixes that makes Echeverias perk up. Combine three parts regular potting soil, one part perlite, and two parts coarse sand.
This is the secret to happy roots and fuller growth. Remember, the sand is pretty crucial as it keeps the soil light and airy.
You could also add compost for extra nutrients. If you live in a humid area, avoid peat-heavy soils. They compact over time and retain too much water.
Tip: Add a pinch of horticultural charcoal—it prevents bacterial rot, especially in tight pots.
5. Pruning the Tops of Rosettes
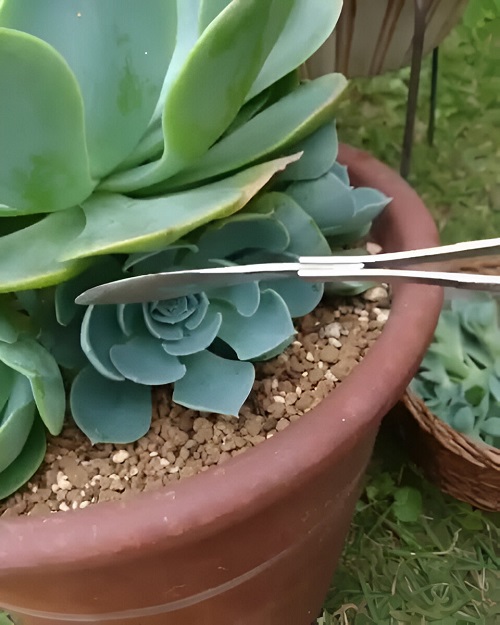
Sounds counterintuitive to having a fuller Echeveria, right? Why would anyone want to cut off rosettes when trying to grow MORE of them? Hear us out!
This step is quite similar to pruning. Cutting off the tops encourages growth from the base—just be careful. Use clean, sharp shears and avoid cutting too close to the base to prevent damage.
Also, remove dried or dying leaves from the base. These block airflow and take up pup-forming space.
And the bonus is that the cut top can root in another pot and grow into a whole new plant!
Note: This hack won’t work for every Echeveria. For example, ‘Rubin’ grows too low to prune safely. Use other methods for such varieties.
6. A Little Food Goes a Long Way
It’s hardly a secret that Echeverias don’t feed much. But if you are looking for more rosettes in a tiny pot, give it a healthy, organic snack once in a while.
You could use manure tea or diluted fish emulsion to add much-needed nutrients to the plant medium. Or, go for a balanced 8-8-8 fertilizer—just once or twice per growing season.
Do not feed at all during winter dormancy, as that may cause legginess or weird leaf growth.
If you notice new growth but no rosettes forming, try switching to a fertilizer with slightly more phosphorus (like 10-15-10) to support blooming and pup development.
Finishing Note
The one mistake that beginners often tend to make is choosing a pot that is too small or too big. But if you have already decided to choose a smaller container, the golden rule is to get one that is just 1-2 inches wider than the diameter of your plant.
A pot tighter than this can actually hinder the production of rosettes, as the roots will be overcrowded. You want to give your Echeveria just enough space that it looks cute while it continues to produce new pups!
Also—rotate your pot every few days. This ensures even light and encourages symmetrical, compact rosette and pup growth.
Try out all the steps given above and let us know how your Echeveria fares in the comments below!