Propagating these easy-care plants is super fun, and if you’re just starting out, here’s how to propagate succulent leaves without soil.

Whether you are trying to get a bunch more jade plants or want another one of your beautiful Sedums or an Echeveria, your first instinct would probably be to propagate them in soil. But hear us out—what if you could propagate succulent leaves fast without soil? Try out this uber-cool method with the steps below!
Steps to Propagate Succulent Leaves
1. Taking Succulent Leaf Cuttings
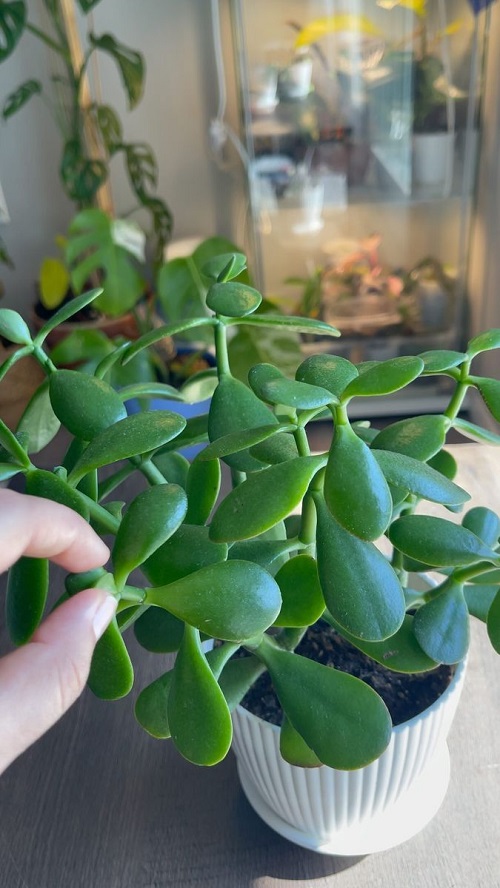
This hardly needs to be mentioned because, of course, the first step would be to secure a few leaf cuttings from your plant. Now, depending on the succulent that you have, you may be able to simply twist off some leaves, or you might need a clean, sharp pair of pruning shears.
For example, if you want to propagate a jade, you can easily harvest the leaves using your thumb and forefinger to snap them off the plant. But for some types of Echeveria or Sempervivum, you might need to use pruners.
Tip: Always choose healthy, plump leaves. Avoid dry, wrinkled, or damaged ones, as they won’t propagate well. A healthy leaf increases the chance of rooting and growing into a strong plant.
2. Opt For Shallow Containers
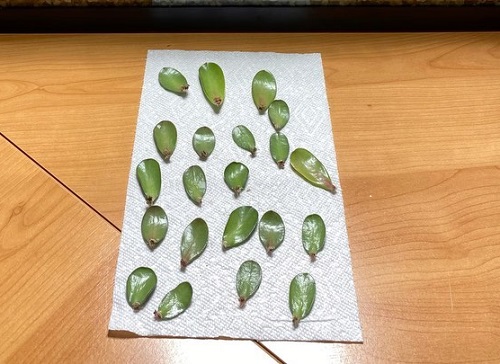
Now, you can’t drop your leaf cuttings straight into water after harvesting them. They need time to “callus.” But what does that even mean? Callusing is just letting the cut ends dry out for a few days so they don’t rot when placed in water.
To do this, lay the cuttings on a dry paper towel and keep them somewhere with bright, indirect sunlight. Over the next few days, the cut ends will scab over. This step is key to stopping bacteria or fungi from sneaking in and causing infections.
After this, choose a shallow container where you will propagate your leaf cuttings. This is essential because it helps you avoid submerging the entire cutting or leaflet into the water (doing so causes rotting!).
Note: You might choose to use a rooting hormone at this stage as leaf cuttings are known for being slow to grow. Any commercially bought rooting hormone would work well, but you must research specifically for the succulent you are trying to grow.
Here’s a neat trick—if you don’t have rooting hormone on hand, try cinnamon or honey instead! Both have mild antifungal properties and can gently encourage root growth.
3. Changing the Water
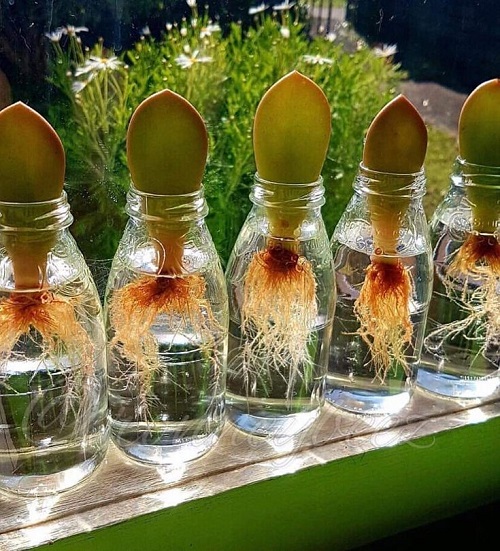
Once only the bottom part of your leaf cuttings (no more than a centimeter or two, or about half an inch) touches the water, place the container in a bright spot. A south or west-facing window is your best bet. If you’re already growing succulents nearby, just pop your propagation set-up there too. Easy!
Most importantly, remember to change the water every three days or so. You could stretch this timeline up to a week, provided the water is still clean and not murky. Besides changing the water, there’s not much you need to do at this stage.
Also, make sure your container stays clean. You can gently rinse it with warm water in between changes to avoid any algae buildup or bacterial growth.
4. Transplanting into Soil
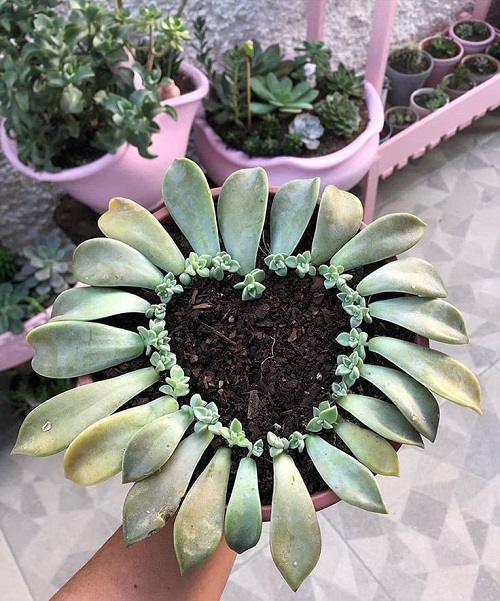
Though rooting time will vary for every type of succulent, you will start to see roots emerge within two months. As they do, you will know your baby succulents are ready to be potted into soil.
Choose a container where your cuttings can comfortably grow for a year or two without being disturbed. They should, of course, have enough drainage holes, and you should fill it with a well-draining cactus or succulent soil mix.
Water once after you have transplanted all your cuttings into the soil and keep the can away! Do not water until the soil dries out completely.
Keep your newly transplanted succulent babies right where the sun is and take care never to disturb the new roots.
Fun Fact: Some succulent growers even use perlite or pumice as a temporary medium before moving cuttings to full soil. It helps keep things airy and reduces the risk of overwatering.
Growing succulent babies in water can be super fun but remember water is not something that these types of plants generally prefer. So, it is important to be very careful when you’re trying out such an experiment. Follow these steps and let us know more about your propagation journey in the comments below!