Do you want to know how to use a single leaf to regrow a full Jade plant in water? Read along and don’t miss out on the bonus tips!
Indoor plants like the Jade plants are no less than the king of houseplants. As they are some of the easiest to grow and maintain plants in nature, even a beginner can do it quite effortlessly. Let’s tell you a budget-friendly way to add more to your collection by learning how to use a single leaf to regrow them in water.
Best Time to Propagate Jade Plants
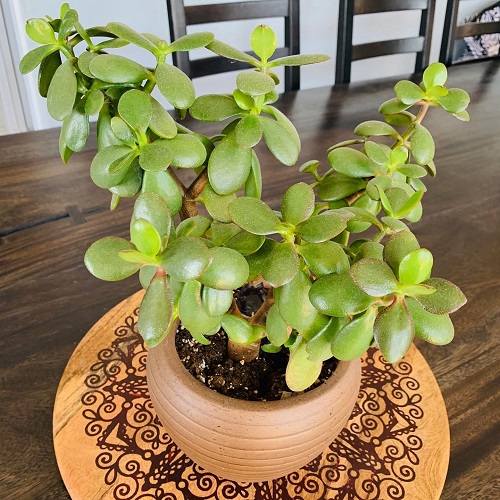
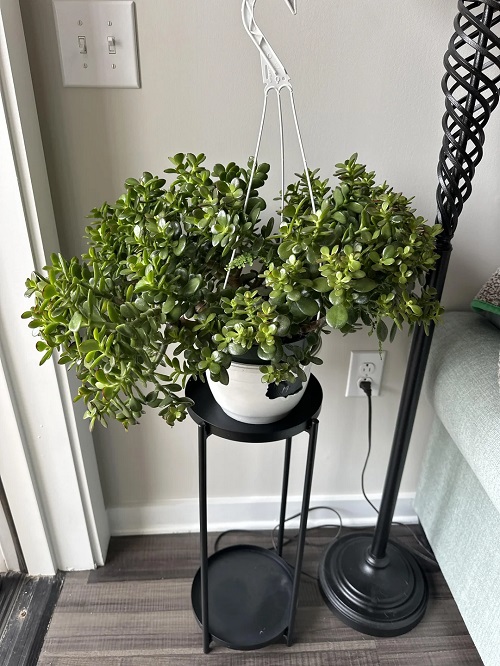
Jade plants, also commonly called the Good Luck, plant are beautiful, evergreen succulents that hail from South Africa. Many misidentify it with different varieties of Elephant bush or Sedum plants too, but they are all not the same.
Rather, they have oval-shaped, glossy green leaves that have a plump or fleshy texture, unlike the Elephant bushes. Coming back to the point, Jade plants tend to grow actively in the spring-summer season. This time is considered the best time to propagate them.
Avoid propagating in the winter, as the plant goes dormant and rooting may take much longer or not happen at all.
How to Use a Single Leaf to Regrow a Full Jade Plant in Water
1. Collect Essential Tools
Gather all the necessary things like—spears/cutters, rubbing alcohol, leaf cuttings, paper towel or plate, potting mix, small container, water, spray bottle, glass jar or tumbler, transparent plastic wrap or cellophane, and gardening gloves.
Whenever you start a project, it’s great to put all the things together in one place. You won’t need to keep on searching for the them at the time of performing the step!
Also, make sure you work in a clean area, especially when handling the cuttings. This reduces the chances of fungal or bacterial infections.
2. Prep The Cuttings
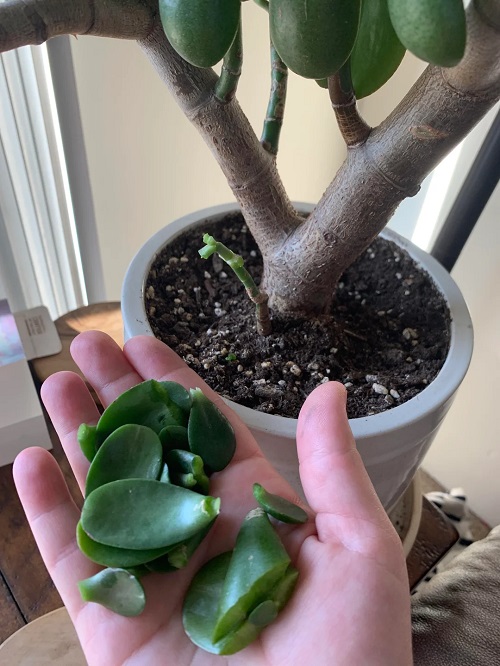
Do you know that the fallen leaves can also be used for propagation? Surprisingly, yes! In their natural habitat, Jade plants grow from the fallen leaves as they come in contact with the soil. So, if you accidentally knock a few leaves off your plant, then you can use them for leaf propagation methods too!
Besides, take a sterile cutter or gently break off the leaves with your fingers from a healthy plant. Go with leaves that are intact, healthy, and plump, without any holes or marks, breaks, or signs of disease.
Avoid using overly mature or wrinkled leaves, as they may rot instead of rooting. Go for fresh and firm leaves for the best success rate.
Caution: Cutting off the leaves with an unsterile cutter can damage the leaves and make them less likely to form roots.
3. Paper Towel or a Plate?
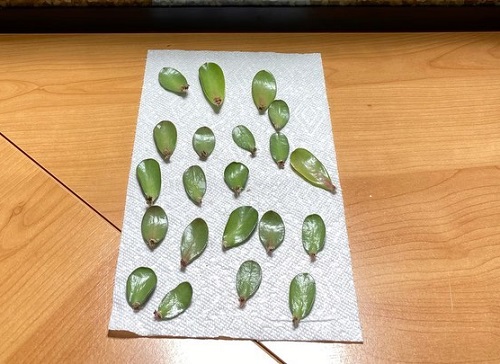
The choice is yours! You may spread the leaf cuttings on a wet paper towel (use a spray bottle) and cover with another one. Leave it undisturbed in a warm and dark place for 1-2 weeks until the cut ends develop calluses and small root ends.
You can do the same thing without a paper towel by placing the leaves on the plate and gently misting them. Place them in a dark and warm place until calluses develop.
4. Prep The Glass Jar
Stay ahead while you wait for the calluses by preparing the glass jar. So, this is quite a creative step, take a jar or a regular tumbler and fill it with clean water (distilled water/RO purified) leaving just an inch gap to fill. Cover the mouth with plastic wrap, and punch holes in it with an old pen.
The holes must be enough to hold the leaf cuttings stable so that they won’t fall into the water! Keep it aside and do it on the day you see healthy callus formation on the cuttings.
If you’re planning to root multiple leaves, use a wider container like a takeaway box with plastic wrap stretched over it for more space.
5. The Gentle Transfer
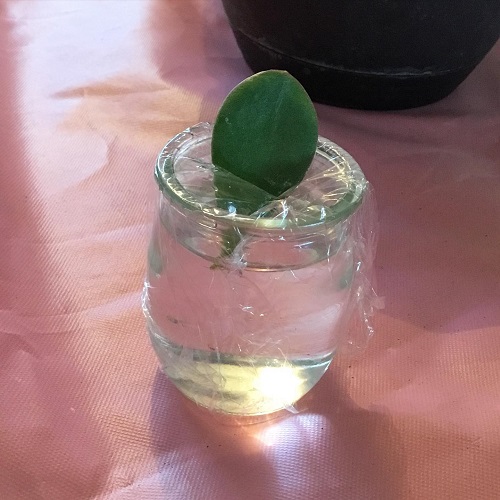
Take out the leaf cuttings from the paper towel or the plate, wherever you have chosen to keep them and gently place them on the holes that you had punched. The placement should be in a way that the ends with calluses face towards water up to the point where they are slightly touching the water.
Don’t shake or disturb this setup too much, rather just place it near a windowsill with indirect sunlight or somewhere with bright light and good air circulation.
Direct sunlight can heat up the water quickly and “cook” the cuttings, so avoid it at all costs.
6. Embrace the Wait!

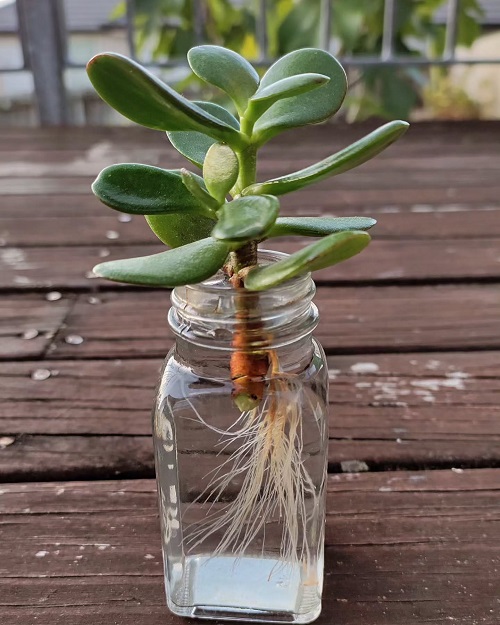
Observe the glass every day for any signs of damage, infection, or contamination in the water. If there aren’t then it’s all good and you may have a rewarding experience as you will observe small white roots within 1-2 weeks.
Once you see this, change the water every week and let the roots develop a little bit more so that they can handle the stress during soil transplant.
If you notice cloudy water or algae build-up, rinse the container and start with fresh water. Keeping everything clean really improves success rates.
7. Transfer to Soil
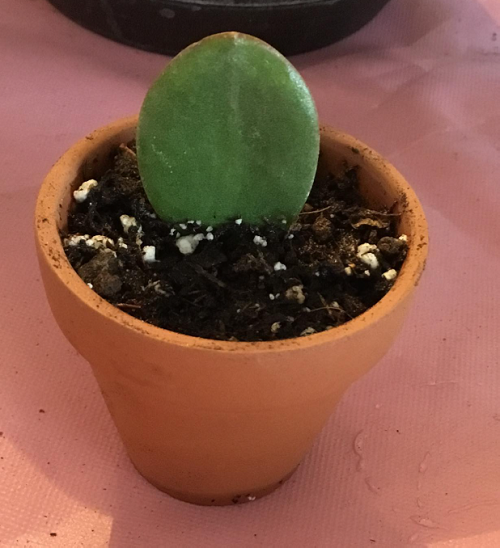
In the meantime, prepare the pots with a well-draining, porous potting medium and keep it pre-moistened before the day of transfer. Gently spread the leaves flat in a single layer over the substrate in a way that they aren’t touching each other.
You may also use a seedling tray for this, as it will be easier to separate when it grows bigger. Place them in bright, indirect light with minimum watering when the topsoil feels dry.
Within a few weeks, you’ll see your new baby Jade plants flourishing one new leaf at a time and growing into a full-grown plant. Once those plantlets are 1-2 inches tall, you can pot them again in separate pots filled with the above-mentioned medium.
And here’s the fun part—each one can grow into its own plant, so you can gift a few to your friends or family as a green surprise!
Interesting Bonus Tips
- They love warm temperatures, and this is also good for faster root growth.
- Avoid plants that are flowering to minimize the stress on the mother plant.
- Take the cuttings, whether it be from the stem or leaves, from a healthy plant only. Since the ones that are infected may carry the disease along or won’t develop well. Look for bright green and plump leaves.
- If you want to speed things up a little so, you can dip the callused ends in rooting hormone powder before placing them above the water. This step is optional, but it can give a boost to root formation.
- Also, remember—some leaves may not make it, and that’s okay! Propagation is a game of patience and odds. So always start with a few extras.
Extra Bonus: If you want to learn to grow Jade plants from leaf cuttings in soil, then check out this care guide.
So, when you successfully make a beautiful collection of many Jade plants in your garden, how would you like to place them?
There are many arrangement ideas for indoor and outdoor settings. Don’t believe this? Check this article here, it’s about unique and interesting ideas! Don’t forget to let us know how it worked for you in the comments section below.