Wondering if you can propagate the String of Pearls in water? The answer is definitely yes and here is a step-by-step guide for you!
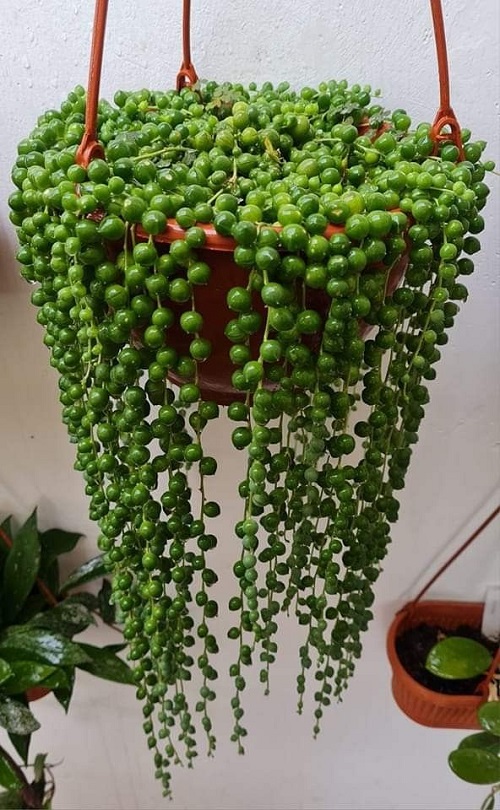
String of Pearls (Senecio rowleyanus) is a gorgeous, trailing succulent with some unique and interesting features. If you want to expand your collection or share this plant with your friends, propagating it in water is an easy solution. Here is a step-by-step guide made easier for you.
Can You Propagate String of Pearls in Water?
String of Pearls is a vine that has small rounded leaves in attractive shapes resembling close to pearls. It mostly grows as a ground cover that establishes roots wherever it grows a new pearl!
The most unique thing about this plant is that each leaf has a small split that behaves like a window. This works like a gateway for sunlight which in turn helps support photosynthesis.
Coming back to the point, the answer is—Yes, it can grow in water! While it typically thrives in soil, it can be propagated in water with great success. This method allows for observation of root development and ensures a higher success rate when transplanting to soil later.
An added advantage of water propagation is that it eliminates soil-borne pests, which can sometimes affect new cuttings. If your mother plant has had issues with fungus gnats or root rot in the past, water propagation is a cleaner and safer alternative!
The Step-by-Step Process
Step 1: Gather Everything!
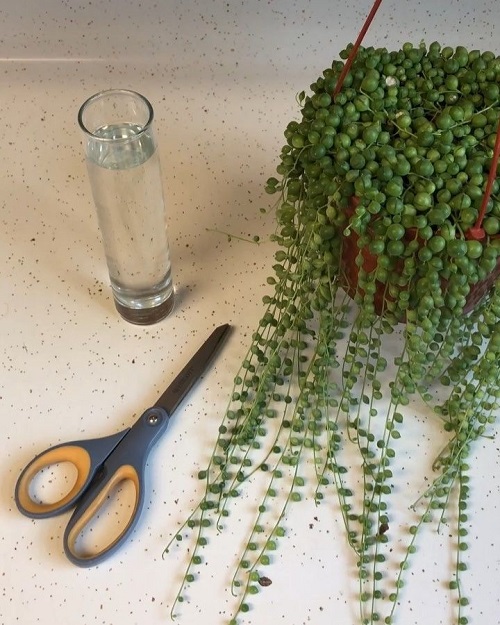
Choose a healthy mother plant with many long stems to ensure better results. Gather sharp scissors or pruning shears and wipe them with rubbing alcohol to minimize infection. Additionally, prepare a glass jar or container with filtered or distilled water filled halfway or up to the desired volume.
Just use lukewarm water instead of cold water, as it helps stimulate root growth faster!
Step 2: Prepare the Cuttings
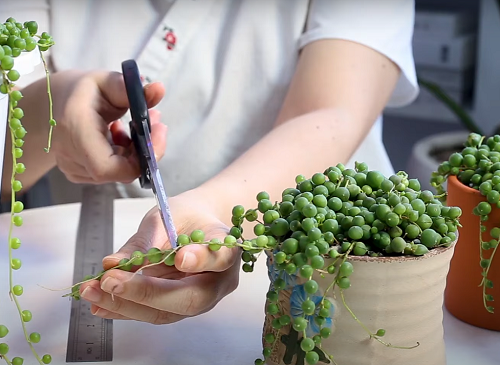
Before making any random selection, go through the mother plant and look for strands that are long and healthy enough to be used as cuttings. Opt for longer strands of at least 5 inches or more with plump and green leaves.
Use your scissors to make a clean cut just below a node (the small bump where leaves grow). Remove a few pearls from the bottom section of the cutting to expose the nodes—this is where roots will form later!
Pro Tip: It can be helpful to carefully sprinkle a small amount of ground cinnamon on the cut ends of the mother plant to protect them from any pests in the soil!
Step 3: Place the Cutting in the Water
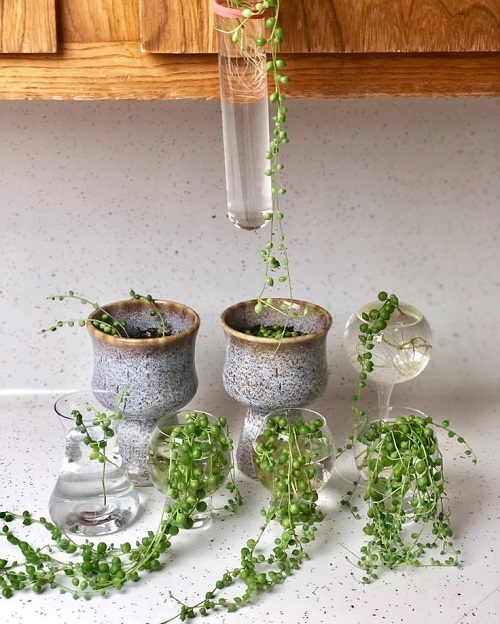
If you want a better outcome then do this—dip the cut ends in a rooting hormone and let them dry for 5 minutes. Place these cuttings in the jar. Make sure that the nodes are submerged and the other section with the pearls is above water. This helps prevent rot.
It’s a pretty simple step, but the catch is that you need to keep changing the water every few days, probably every 3 days would be ideal. Otherwise, the cutting will rot rather than produce new roots due to bacterial build-up and low oxygen availability in the medium!
Because stagnant water holds nitrogen build-ups that result from the dead and decaying cells of the plant, which later become toxic to the new roots if allowed to sit for a prolonged time.
A great way to aerate the water and prevent stagnation is to use an air stone or gently swirl the water when changing it. This increases oxygen levels and helps roots develop faster!
Step 4: Provide the Right Conditions
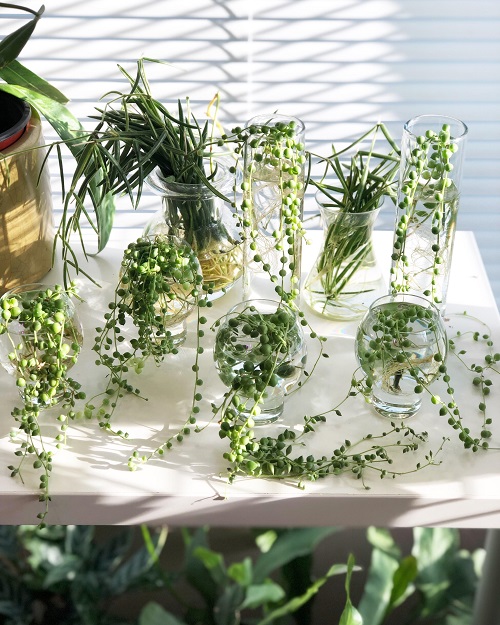
Place the jar in a bright spot with indirect light throughout the day. Additionally, avoid direct sunlight, as this can cause excessive evaporation and damage to the cuttings.
You can also use a sheer curtain on the window to create that indirect light effect and keep the jar beside the window for proper air circulation. Better air circulation helps minimize potential infections as well.
If you live in a colder region, consider placing the jar on a heating mat set at a low temperature to encourage root development. Warmth speeds up the propagation process!
Step 5: Monitor Root Growth
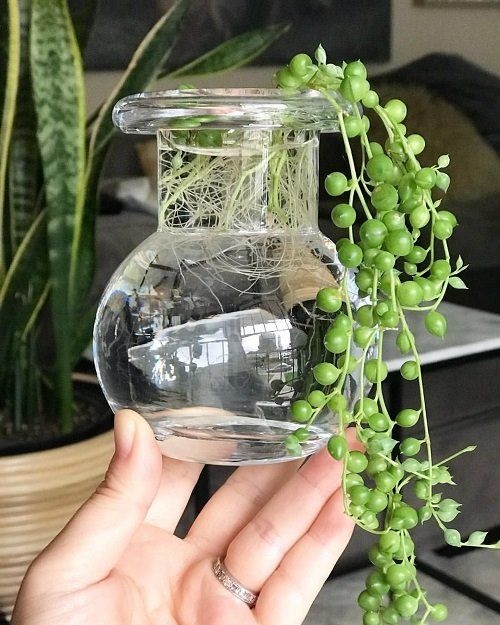
So, within 2–3 weeks, you’ll be having the best rewarding experience! The cutting will develop small roots from the submerged nodes. Let them grow more, and be strong enough to hold and support the plant.
In the meantime, be patient, as root development varies depending on temperature and humidity. Also, let the roots grow up to at least 1-2 inches before transferring them into the soil.
If roots are slow to appear, try adding a few drops of liquid seaweed fertilizer to the water to stimulate growth!
Step 6: Transfer to Soil
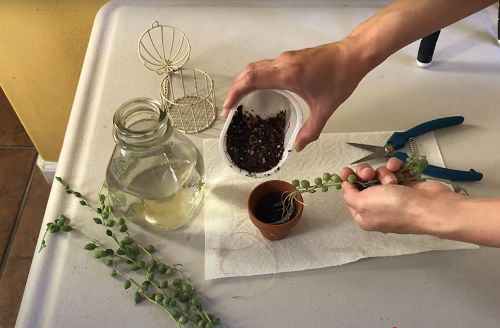
Once the roots are about 1–2 inches long, you can transfer your cutting to a well-draining succulent potting soil. Use a shallow pot to do this because the roots of the String of Pearls do not go deep into the soil but rather stay near the surface.
Plant the rooted stem in the soil and lightly water it to help with the transition. Place the container in a bright location with indirect sunlight or where only the morning sunlight falls.
To make the transition smoother, you can mix a little perlite into the soil to retain some moisture while allowing drainage. This helps the plant adjust from water to soil easily!
Tips for Success
Always opt for a transparent glass jar to monitor everything that is happening below—especially root development! Try not to overcrowd the jar with multiple cuttings—rather, use two or three jars if you have many propagations because, for a medium-sized jar, 4-5 cuttings are enough.
Never ever feel too lazy to change the water regularly. Yes, that is the key to water propagation for any plant. This will ensure better results and prevent bacterial buildup or any kind of infestations. Lastly, after you have transferred the plantlets to the soil, gradually acclimate them to dry conditions by reducing water.
If you have multiple cuttings, experiment by propagating some in water and some directly in soil. This way, you can compare which method works best for you!
So, let us know when you are going to give it a try, and enjoy watching them develop into individual trailing vines. Do write to us in the comment section below.


