
Has your aloe vera been looking too sad lately? Well, here we will see why aloe vera gets leggy and also how you can reverse it.

Aloe vera is loved because of its unusual growth habit that makes its leaves grow quite upright and very close together. But imagine if this starts drooping. Not a good look, right? This is what we are here to tackle—a leggy aloe vera. We will also see how you can reverse legginess for compact growth.
Reasons Why Aloe Vera Gets Leggy
The amazing thing about succulents is that they don’t often need anything often. However, if you haven’t tended to your succulents, especially ones like Aloe vera, for a long time, there will definitely be signs. Besides some lack of grooming, here are the top reasons why aloe vera gets leggy.
1. Not Enough Sunlight

Just like any other succulent, aloe vera loves the sunlight from south and west-facing windows. If you have been keeping your aloe vera in partial shade for fear of damaging the leaves, move it to a bright spot immediately before it gets even more leggy!
While it is true that too much direct sunlight might burn the leaves, filtering out sunlight with a sheer curtain from bright windows will work perfectly. Aloe vera usually needs at least six hours of bright, indirect sunlight every day for healthy growth.
Bonus Tip: Even if your aloe is getting enough light, it might still start leaning or stretching toward the window if you don’t rotate the pot regularly. Just give it a gentle 90-degree turn every few days. This helps your aloe grow evenly on all sides and stay upright instead of reaching or falling over.
2. Overwatering is a Bane
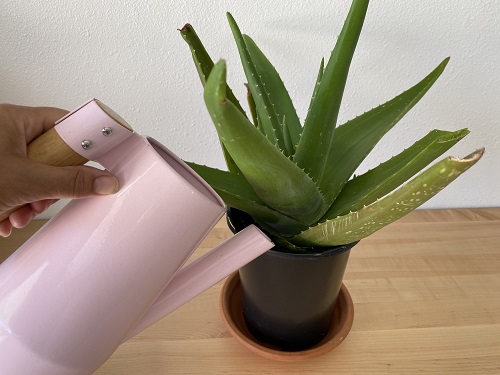
There is hardly anything worse than overwatering a succulent. Aloe vera, being one, stores water in its leaves, this is why it does not get thirsty often. If you have been following a strict watering schedule instead of trying to gauge what your plant exactly needs, your plant will get leggy.
Moreover, overwatering can also give rise to a host of other problems, like yellowing leaves and, worst of all, root rot. This is why you must always let the soil dry out completely and do the “finger test” before watering the plant.
3. Improper Drainage

Now, this might seem similar to the previous point, but it is actually different. You may be watering at the right frequency, but if that water has nowhere to go, it does not bode well for your aloe vera.
When growing this plant, always ensure that you are using a slightly acidic soil mix specifically designed for succulents or cacti and incorporate perlite and coarse sand. This makes the soil more aerated and helps it drain better.
Additionally, if you have chosen a pot with little to no drainage holes, that could also be causing bad drainage and legginess in your aloe vera.
4. Pot Size Matters Too

Sometimes, we unknowingly give our aloe too much space. When a pot is too big, aloe vera shifts its energy toward growing roots rather than staying compact on top. This can lead to stretched-out, floppy leaves.
The excess soil also holds more moisture than needed, which encourages leggy growth. So, always pick a pot that’s just one size up from the current one—snug but not cramped.
How to Reverse Legginess in Aloe Vera for Compact Growth
1. Trim Leggy Leaves
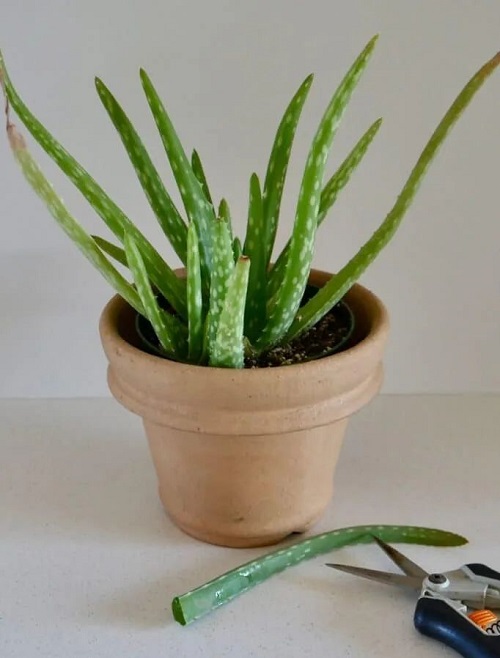
It’s easy to identify leggy leaves. For starters, they are the ones that look droopy or are stretched out towards the light source more than other leaves. Secondly, you will notice reduced width in the leggy leaves, while the healthier ones are thick and firm.
After identifying the unhealthy leaves, it’s time to get snipping! Start by snipping the leaves as close to the stem as possible. You can also cut at the stems below where you see leggy growth. Choose a pair of sharp, clean scissors for this step to cut through the thick leaves and stems.
2. Repot Your Aloe

This might seem like quite a basic step, but most people avoid it! Repot your aloe after you have given it some TLC with the pruning step. Let the pruned cuttings harden off before you repot it into some succulent soil mix with perlite or sand.
Gently pull out the main stem from its existing pot and choose a pot that is slightly bigger than the one your aloe had been growing in. Press down your aloe into the soil, and voila, you are done! For your cutting, remove excess roots (they can do just fine with fewer roots in the short term) and any pups that may be hanging around.
3. Propagate Any New Pups

From the pups that you gather after pruning and repotting, you can expand your aloe collection even more! Thanks to aloe vera producing offsets so vigorously, it is easy to get an overcrowded pot. Snipping these away along with the roots, and growing them in a larger pot can give your plants a chance to breathe. Plus, it prevents them from fighting for space in the same pot.
Though you should always take good care of your aloe vera, sometimes you might find it getting leggy, especially if you are away for days. In those cases, the above tips will surely help you reverse that and get your plant compact and beautiful!
