
As an Amazon Associate, we earn a small commission from qualifying purchases — at no extra cost to you.
Did Pinterest suggest a macramé wall planter to you, but you don’t know how to make it? You’re at the right place, and we have what you need!
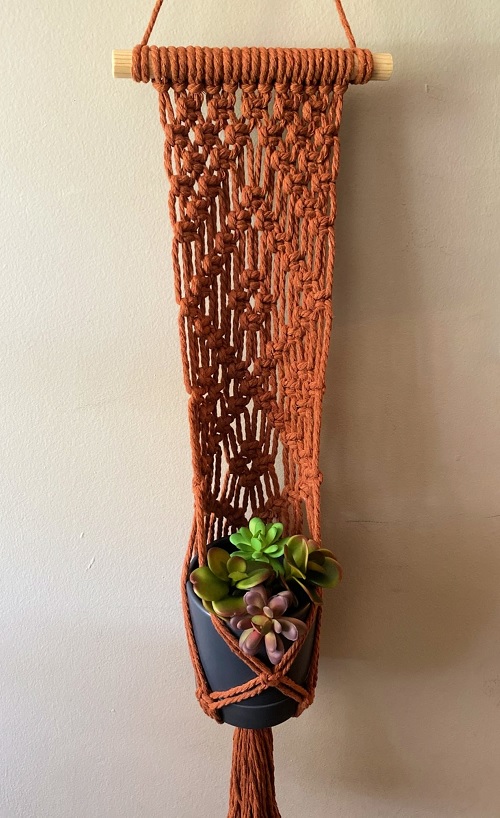
There is something magical about turning a simple bundle of cotton cords into a beautiful piece of home decor. A handmade macramé wall planter not only showcases your favorite indoor plants but also adds warmth, texture, and a personal touch to your space. Ready to get crafty?
No need to go macramé material shopping because we have everything for you compiled in one place in our Amazon Macramé Storefront. Pick your match and let’s get going!
Step-by-Step Guide to Make a Macramé Wall Planter
Skip the shopping hassle because we have the all-in-one macramé kit you need to create beautiful macramé projects from day one.
Grab the Essentials
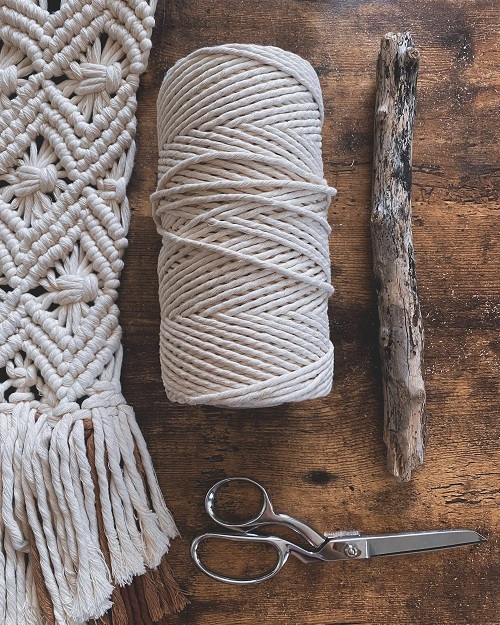
Before you begin, you need your supplies for this journey. Start by getting a 3 mm or 4 mm cotton macramé cord, a wooden dowel or driftwood stick, sharp scissors, a measuring tape, a plant pot (4–6 inches), and wooden beads, if you wish to add some decoration.
Create flawless knots with premium cotton cord that is strong and supportive to help keep your plants secure.
Cut your Cords
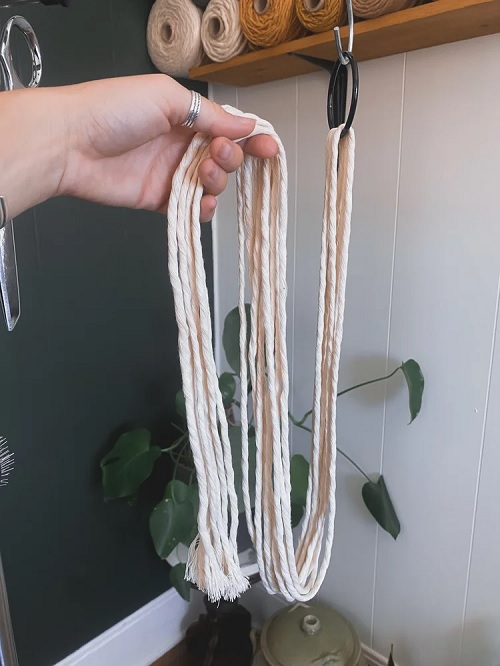
Cut 8 pieces of macramé cord, each about 2.5 to 3 meters long, depending on the desired planter length. Fold them in half to create 16 working strands. Longer cords will give you more flexibility and prevent you from running short while knotting.
Attach the Cords
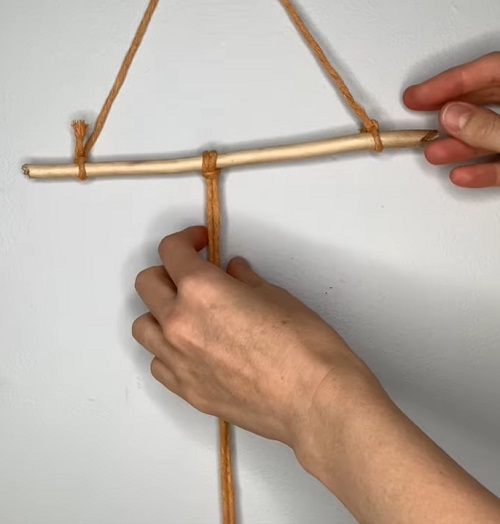
Place the wooden dowel horizontally and secure each folded cord using a Lark’s Head Knot until all cords are attached evenly. This creates a neat and sturdy foundation for your planter.
Give your wall planter a clean, designer finish. Grab sturdy wooden dowels that instantly elevate every creation.
Create the Hanging Section
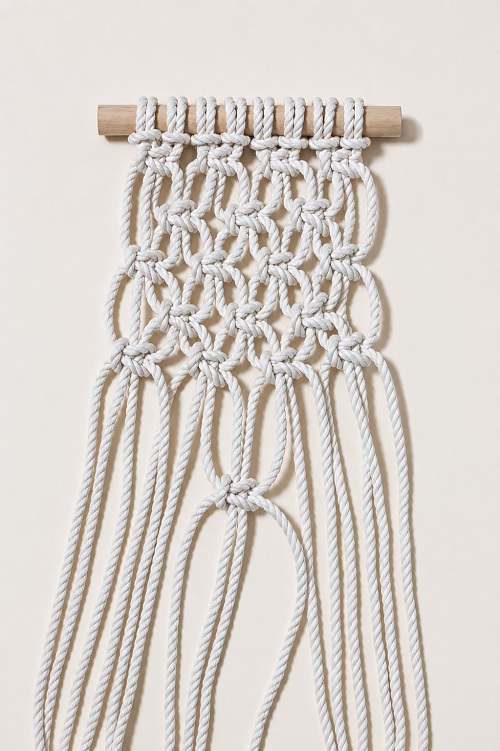
Separate the cords into groups of four. Tie several square knots on each group, leaving small spaces between them. Repeat until you’ve created a decorative upper section approximately 20- 25 cm long.
Now this is when your creativity will peak. You can alternate square knots with spiral knots for extra texture.
Form the Plant Holder
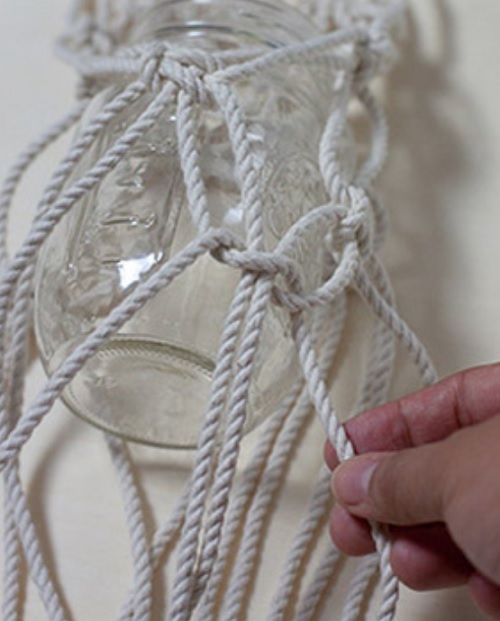
Now it’s time to build the basket. Take two neighbouring strands from adjacent groups and tie them together using square knots about 10 cm lower than the previous row.
Now continue around the planter, creating a diamond-shaped mesh. Repeat one more row if you think some additional support is required.
Secure the Bottom
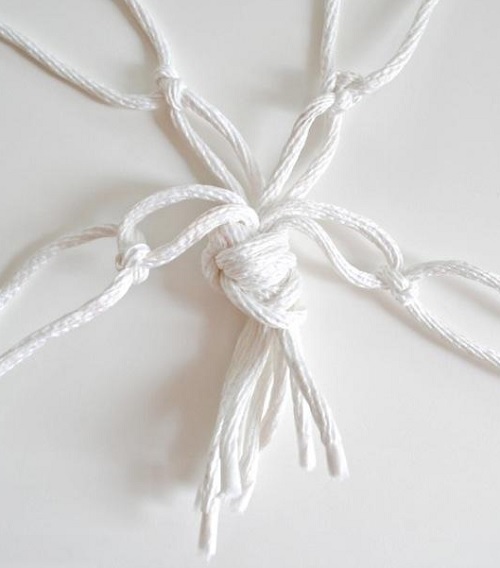
Gather all remaining cords beneath the basket. Tie one large gathering/wrapping knot tightly and lock everything in place. Trim the remaining cords into a tassel or leave them long for a boho-inspired finish.
Put your Plant
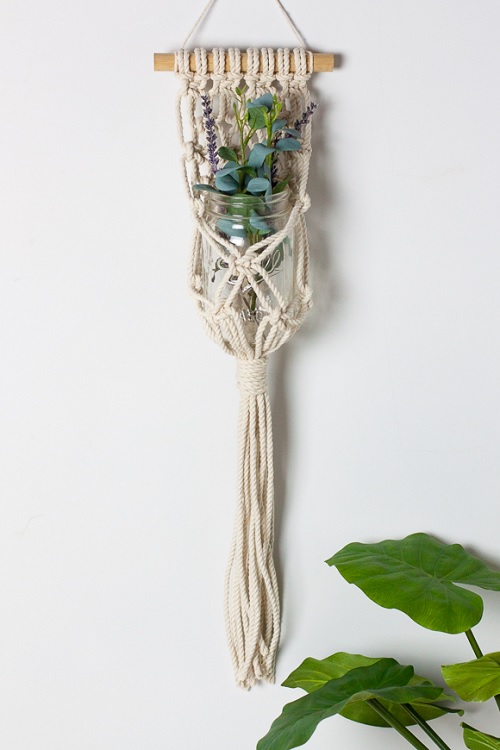
Pick your favorite plant and put it into this woven holder for a Pinterest-coded feel. You can place pothos, spider plants, philodendrons, string of pearls, or English ivy.
Choose lightweight pots with drainage holes to keep your macramé planter secure and make watering your plants much easier.
Friendly Tips!
Mix planters of different lengths for a layered wall display. Add wooden beads for a Scandinavian-inspired look. You can use natural cottons for a rustic aesthetic or colored cords for modern interiors. But in the end, remember to pair several hanging planters with floating shelves for an indoor jungle effect.
Transform a simple wall planter into a cozy boho dream with wooden beads that make every project stand out.
Avoid!
Don’t cut the cords too short, and avoid pulling knots with uneven tension. Use heavy ceramic pots with adequate support and test the planter before hanging.
Macramé is one of the easiest crafts to practice, and if you wish to be more inspired, then this beginner’s guide to macramé is all you need. Let us know how it turned out for you in the comments below!